
 Shuffleboard Refinishing
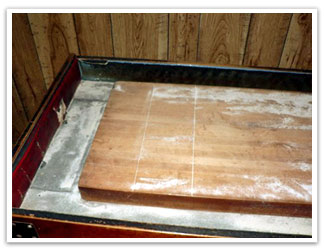
Here are some pictures of Brian Robertson's refinishing project.
Note the water spot - Also note the dark sides - this is
the polyurethane - the top is completely wore off.
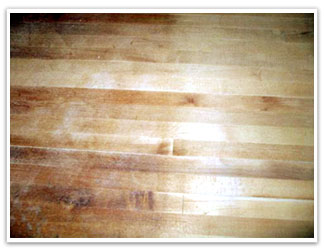
What a difference one pass made.
Just smoother - no color change - NO WATER SPOTS FOR SURE.
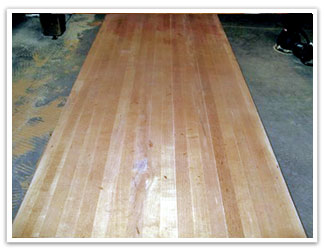
Nice and smooth under 3 coats of poly.
Brian's Shuffleboard Refinishing Technique Top
• I took the table off and placed it onto several 4x4s on the ground
• Sanded with the grain, in 3 foot sections, using 60 grit sandpaper on an Orbital Sander. (Sanded the sides as well)
• I re-sanded the top using the same techniques with both 100 and 150 grit sandpaper (Sanding will create a TON of dust. I should have hung up a plastic barrier)
• After dusting off the block I then applied 1 coat of sanding sealer
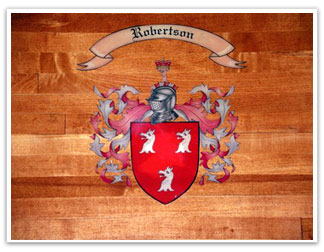
• I printed a picture of my family crest, using a laser printer, and card stock. I was going to have to have it painted on but came across decoupage - which is basically putting tons of glue or sealant on top of pictures and stuff - I then applied polyurethane and it work great! (Took 2 hours and an X-acto knife and cut along all the edge. I lightly sprayed the back of the crest with spray adhesive and placed in the center.)
• I then applied MINWAX HIGH BUILD SELF LEVELING POLYURETHANE.
•
The first coat I used a foam brush. (Ignore the brush strokes. LET DRY COMPLETELY.)
• Then sanded using 220 grit sandpaper on the orbit - not applying that much pressure ( I skipped over the section where the crest was because it was still "above" the poly.
•
I used a towel to dusted the top of the table off. (Top will be cloudy.)
And applied a second coat of polyurethane using brush (After it dried I sanded with 220 again.)
• I then got somewhat impatient and lightly poured the gallon of poly down the board and pushed it around using a new foam brush.
•
I let the extra poly run off onto paper on the floor
o I also ran brush down the sides to not see "drip" marks.
I did this 2 times, sanding in between coats.
I was able to sand over the crest after the 3rd coat (lightly)
End result ---- IT CAME OUT GREAT
Rails and gutters
• I separate the table into 2 pieces. Took the side rails off
and removed the support boards (the boards that act as the gutters). They were in two 12' sections.
• The support board was old and brittle - so I rebuilt using prime pine.
• While top was off I flipped over the table and replaced the feet with new carriage bolts, washers, and nuts.
• I also polished the wood and brackets as well.
• Flipped it back over, then screwed the pine into the leg stands.
• Covered the pine with red felt - using spray adhesive. I also used vinyl to recover the end pads.
The side vinyl was attached using the same technique the table originally had. Stapled the vinyl to the top of the rail. Using a cut roofing shingle - YES a roofing shingle, pull the vinyl over top for a nice clean edge and staple on the bottom (where no staples can be seen).
• Then had to reattach the side rails to the pine using new screws and washers EVERYWHERE. I drilled pilot holes and rescrewed in everything.
.